I2P is a fully encrypted, peer-to-peer anonymous network that runs “inside” the internet, and the Java implementation from i2p.net remains the flagship way to use it. Unlike Tor, which primarily anonymizes access to the regular web, I2P creates an entirely self-contained network of hidden services, websites, email, chat, and file sharing.
What happens the moment you start I2P
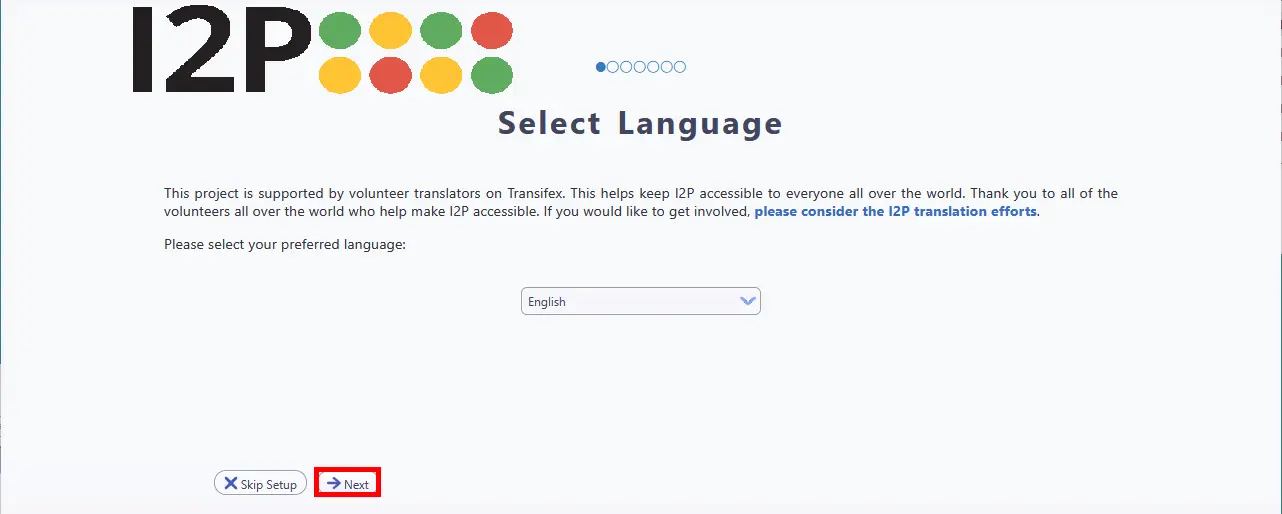
After installation, I2P launches a local web application called the router console at http://127.0.0.1:7657. This is your command center it runs entirely on your machine and is bound to localhost for security. On first launch, a setup wizard walks you through language selection, theme choice (dark or light), and an automated bandwidth test that takes roughly one minute using the external M-Lab measurement service. You then set what percentage of your bandwidth to share with the network.
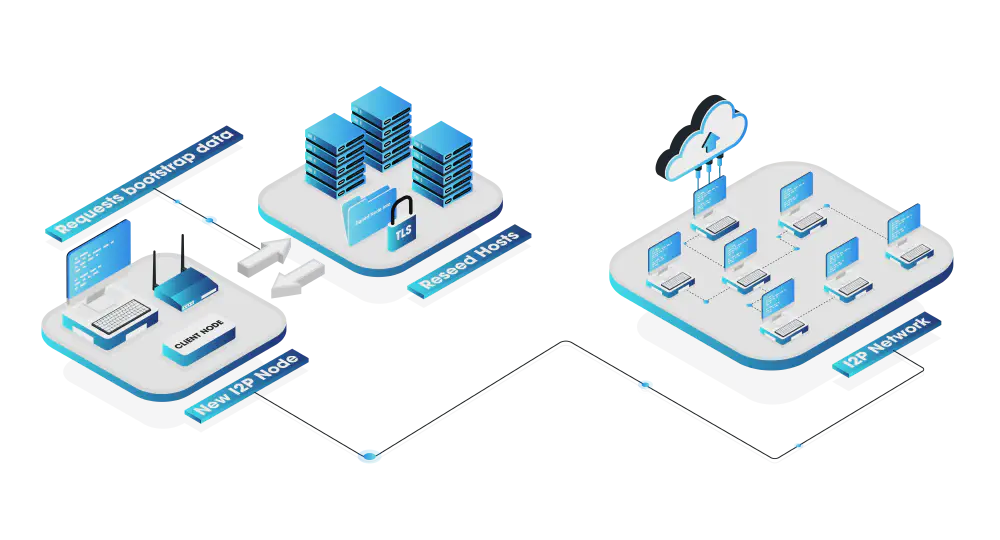
Once the wizard completes, the router begins bootstrapping a process called “reseeding.” Your router downloads about 100 RouterInfo records from hardcoded reseed servers over HTTPS, giving it an initial list of peers. From there, it starts building exploratory tunnels to discover more peers and populate its local copy of the network database (the “netDb”). You’ll see a “Rejecting tunnels: starting up” message during these first minutes. This is normal.
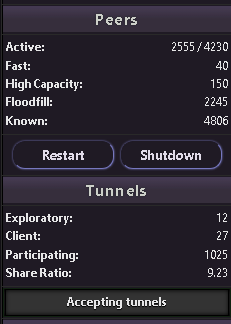
Expect to wait 3–10 minutes before your router becomes usable, and significantly longer - days of continuous uptime - before it hits peak performance. The router console sidebar shows your peer count as “Active x/y,” where x is peers you’ve exchanged messages with recently and y is all peers seen. Once you see 10 or more active peers, your router is healthily connected. The single most important thing a new user can do is leave the router running continuously. After a shutdown, other nodes mark your router as unreliable for at least 24 hours, so frequent restarts cripple performance.
Configuring your browser for I2P
I2P, unlike the Tor Network, does not come with a dedicated browser. To access I2P sites (the .i2p pseudo-top-level domain), you need to configure your browser’s proxy settings to route traffic through the I2P HTTP proxy on port 4444.
The easiest path for Windows users is the Easy Install Bundle, which bundles Java, the router, and a pre-configured Firefox profile with the “I2P in Private Browsing” extension. It eliminates all manual proxy configuration. From download to browsing I2P sites takes roughly four minutes. A macOS Easy Install bundle (Apple Silicon) is also available in beta. If you’re using the Easy Install Bundle, you can skip the manual setup below.
Firefox (Recommended)
Firefox is strongly recommended because it has its own proxy settings independent of your operating system - Chrome and Edge use system-wide proxy settings that affect all applications.
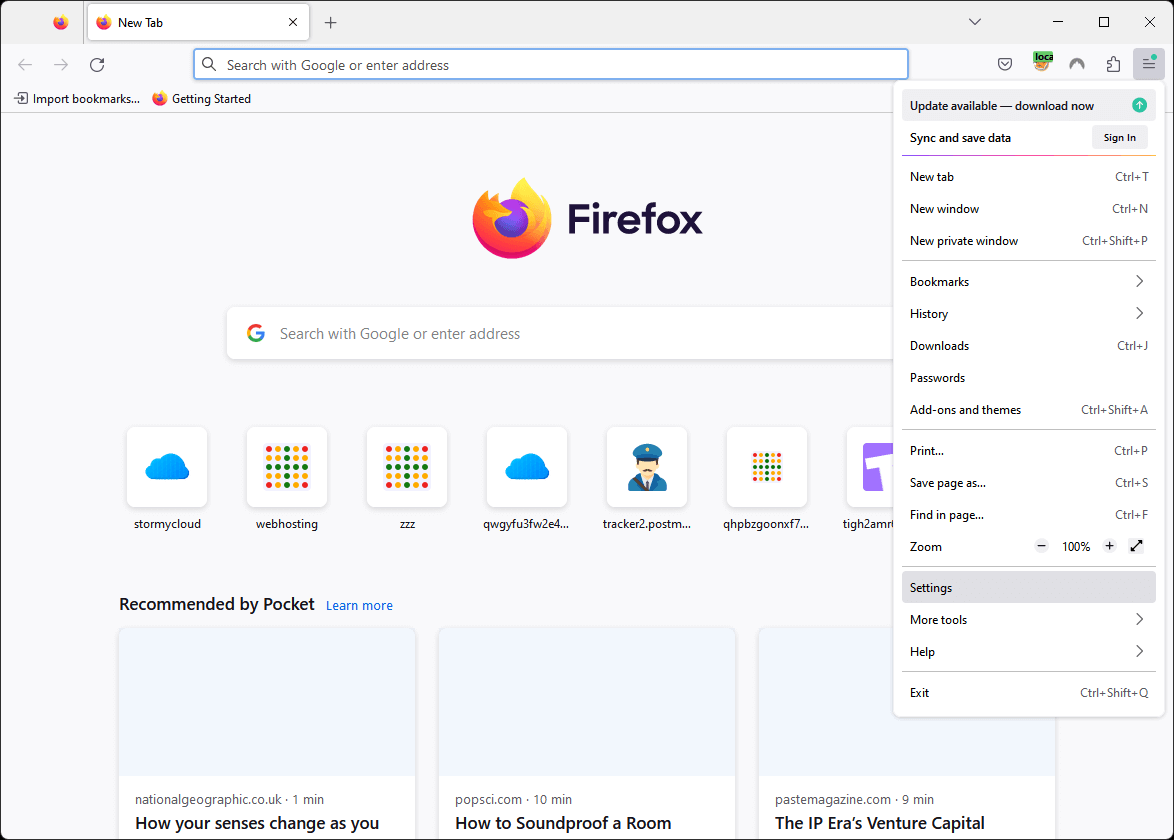
Step 1. Open the Firefox menu (hamburger icon) and click Settings.
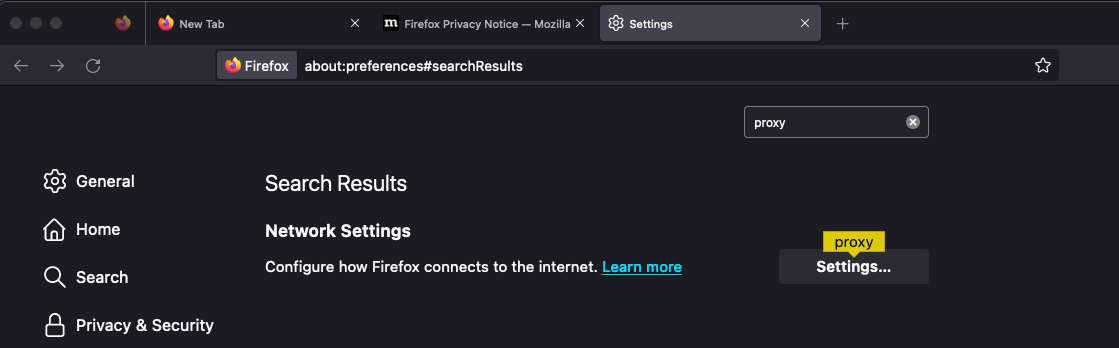
Step 2. Search for proxy in the settings search bar, then click Settings… next to Network Settings.
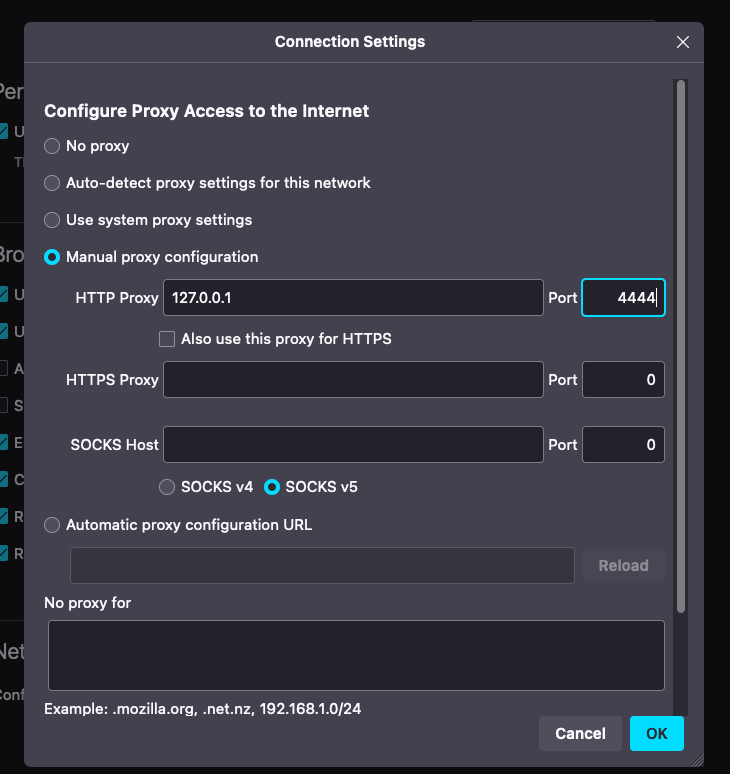
Step 3. Select Manual proxy configuration, enter 127.0.0.1 for HTTP Proxy and 4444 for the port, then click OK.
After setting the proxy, several about:config tweaks are recommended:
- Set
media.peerConnection.ice.proxy_onlyto true (prevents WebRTC leaks) - Set
keyword.enabledto false (stops search engine redirects on .i2p addresses) - Create a boolean
browser.fixup.domainsuffixwhitelist.i2pset to true (tells Firefox that.i2pis a valid domain suffix)
A persistent gotcha for beginners: always type http:// before .i2p addresses. Most I2P sites don’t use HTTPS (I2P already encrypts all traffic end-to-end), and without the prefix Firefox will redirect you to a search engine.
Chrome / Edge (Windows)
Note: Chrome and Edge use your operating system’s proxy settings, which affects all applications on your system.
Step 1. Open the Chrome menu and click Settings.
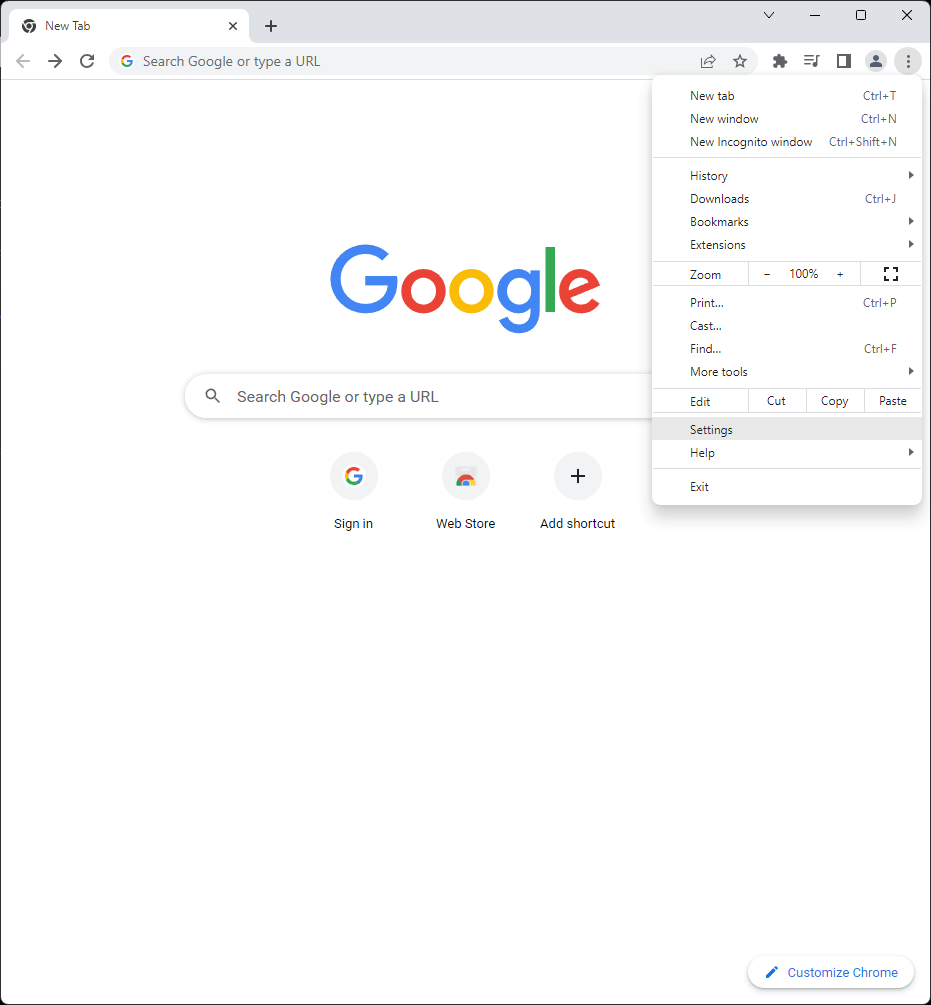
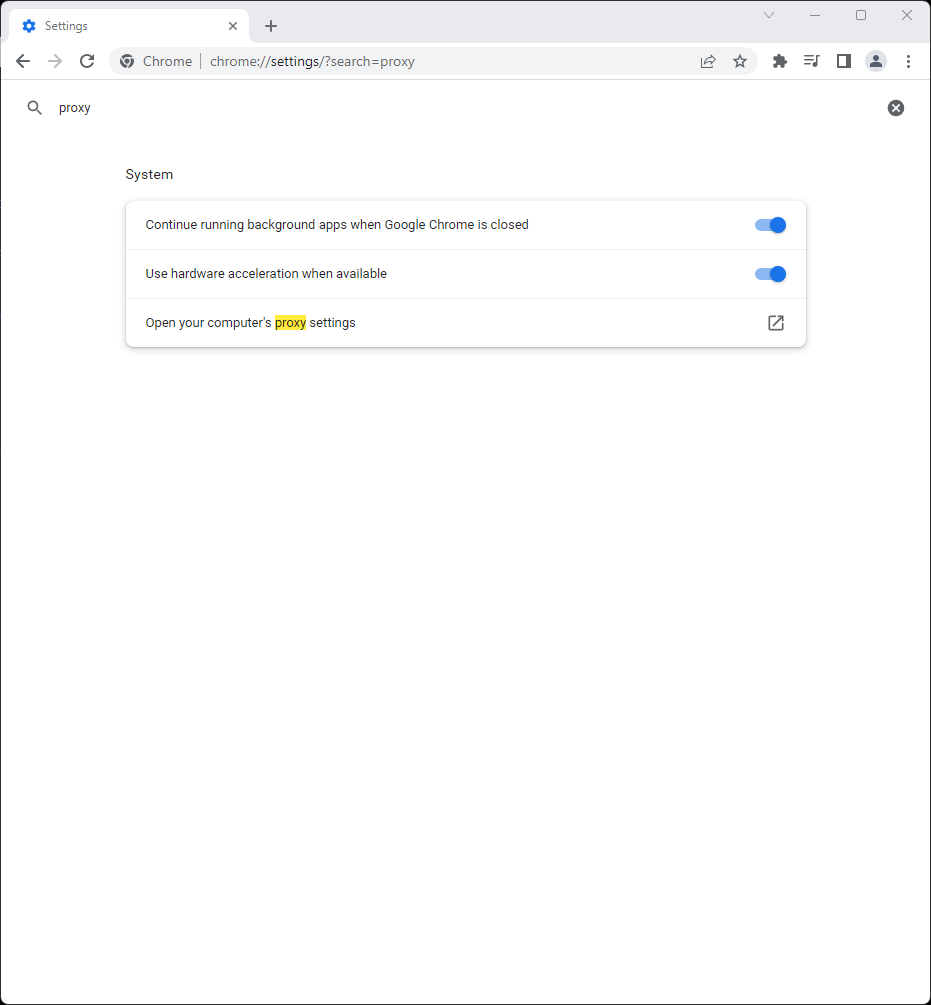
Step 2. Search for proxy, then click Open your computer’s proxy settings.
Step 3. Under Manual proxy setup, click Set up next to “Use a proxy server.”
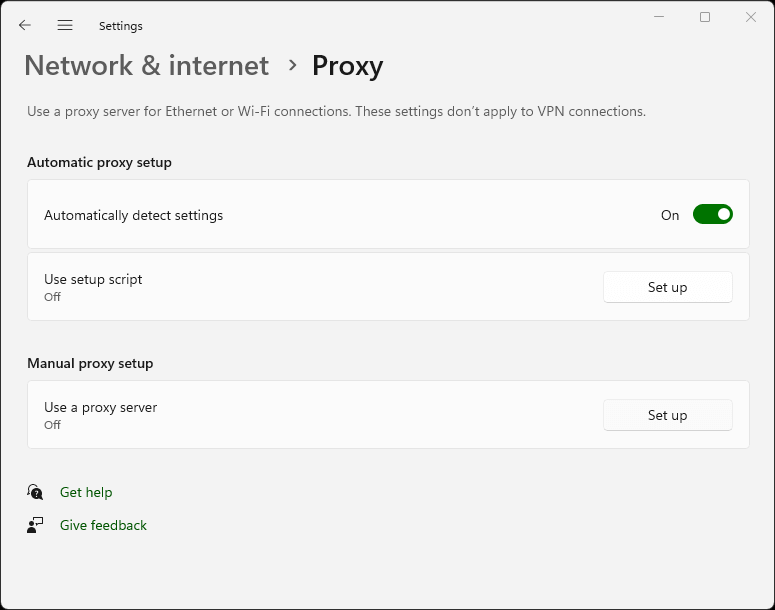
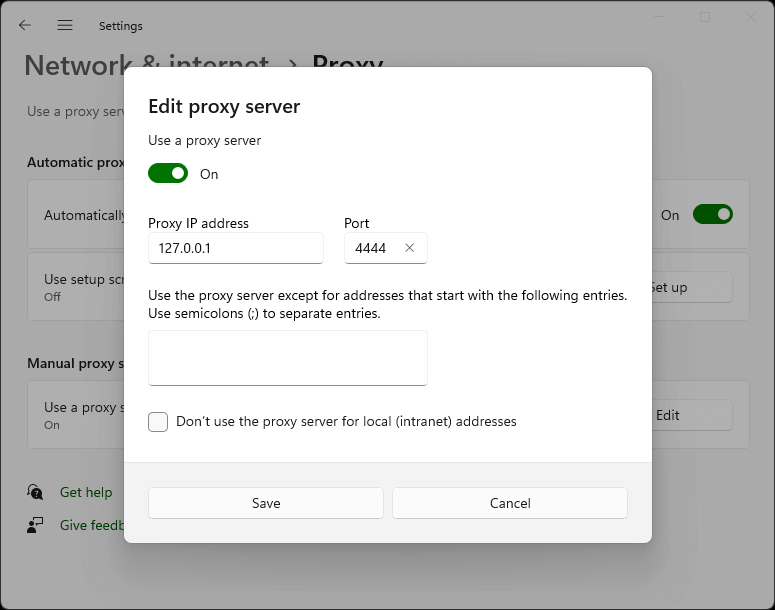
Step 4. Toggle Use a proxy server to On, enter 127.0.0.1 for the Proxy IP address and 4444 for the port, then click Save.
Safari (macOS)
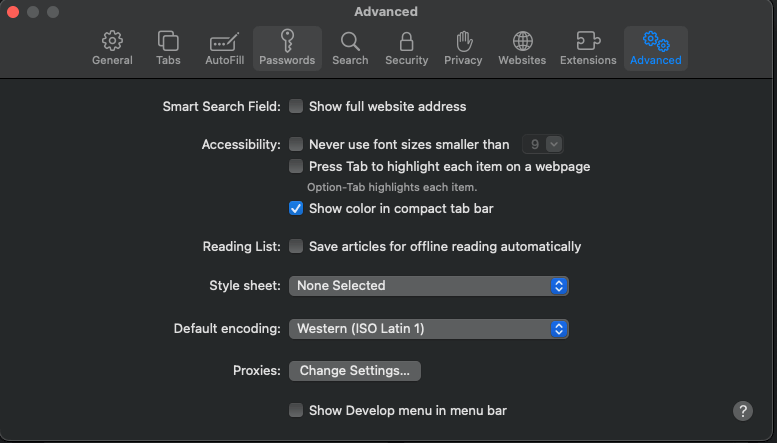
Step 1. Navigate to Safari → Settings → Advanced and click Change Settings… next to Proxies.
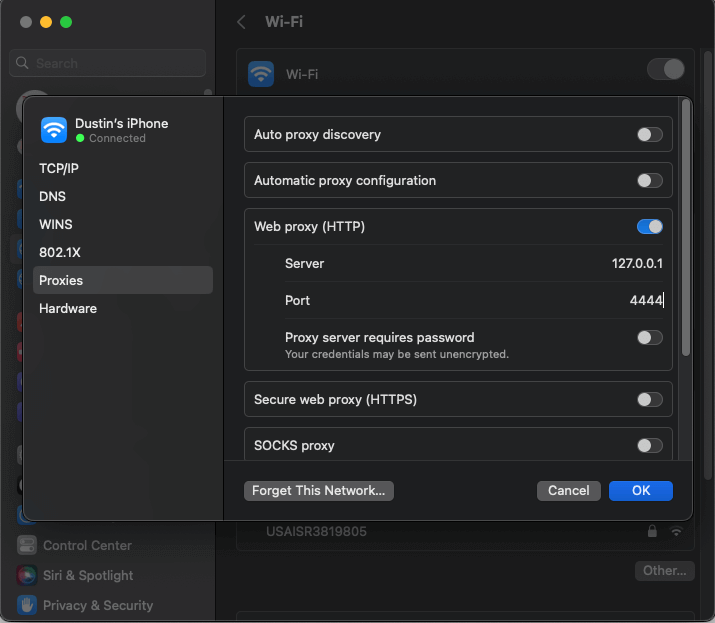
Step 2. Enable Web proxy (HTTP), enter 127.0.0.1 for the server and 4444 for the port, then click OK.
Understanding the router console dashboard
The router console at 127.0.0.1:7657 displays several key indicators that tell you how well your node is performing. The sidebar shows your I2P version, uptime, bandwidth usage (in/out), active peer count, and tunnel status. When “Shared Clients” turns green, your router is integrated and ready.
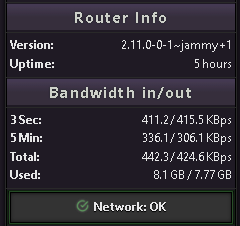
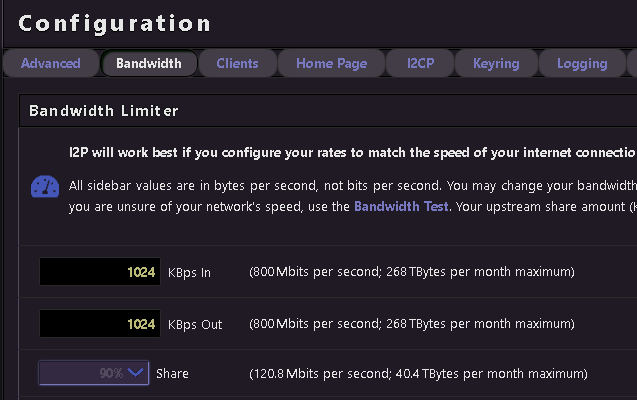
Bandwidth graphs show real-time throughput. The defaults are conservative - 96 KBps down and 40 KBps up with only 48 KBps shared -and the official documentation strongly recommends increasing these. Navigate to http://127.0.0.1:7657/config (or click “Configure Bandwidth” in the console) to raise your limits. Higher shared bandwidth improves both your own performance and the network’s health. Setting shared bandwidth below 12 KBps effectively puts your router in “hidden mode,” cutting you off from participating traffic. At 128 KBps or above, your router may be promoted to floodfill status, which means it helps maintain the distributed hash table.
The tunnel status section shows participating tunnels - traffic you’re relaying for others. Over 90% of I2P routers relay participating traffic by default. This is simultaneously cover traffic for your own anonymity and your contribution to the network. Tunnels expire every 10 minutes and are rebuilt automatically.

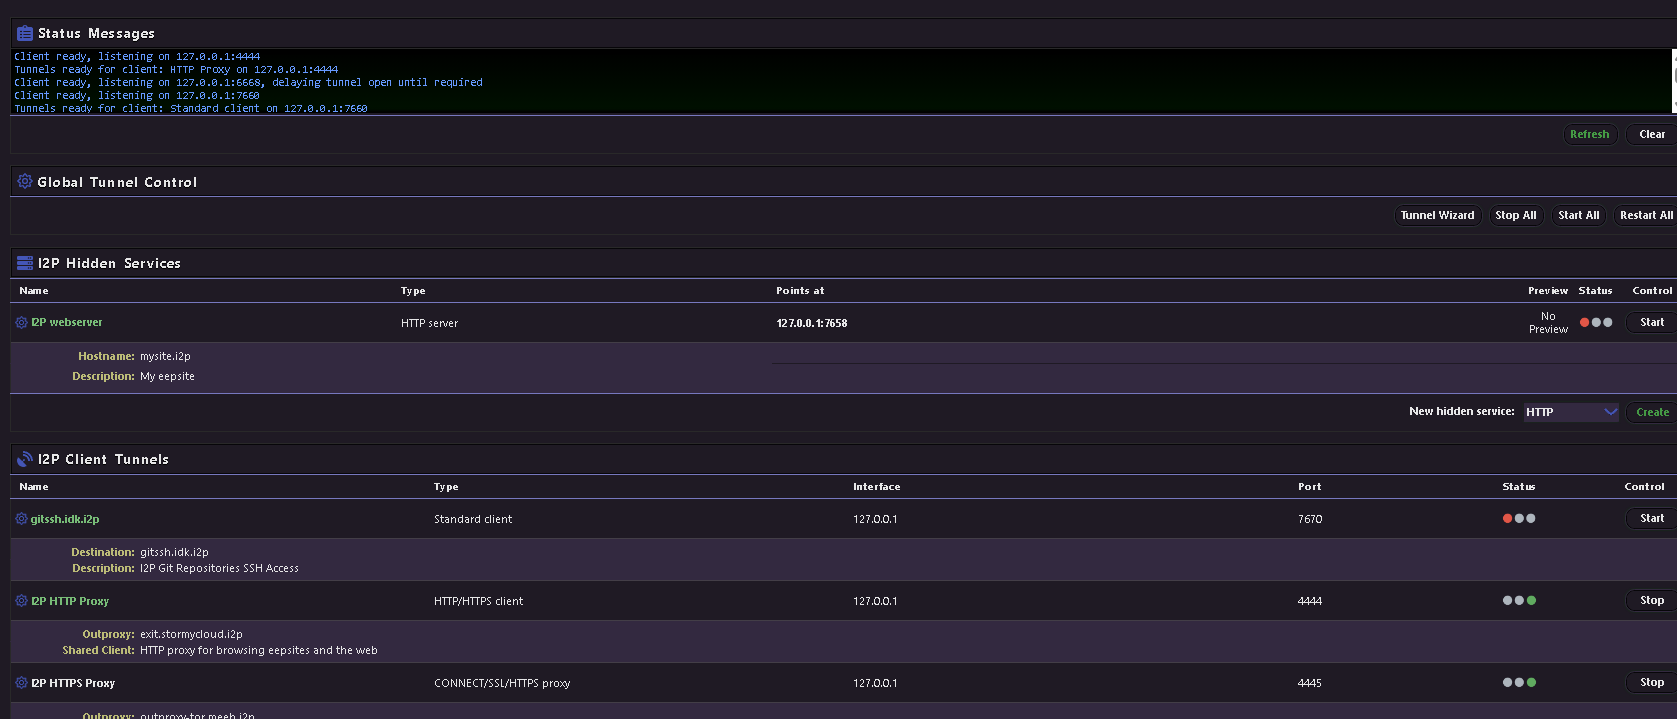
The I2PTunnel manager at http://127.0.0.1:7657/i2ptunnel/ shows all your configured tunnels - the HTTP proxy, IRC, email, and your eepsite server tunnel are all pre-configured out of the box.
| Console page | URL | Purpose |
|---|---|---|
| Home / Status | localhost:7657/home | Dashboard with peers, bandwidth, tunnels |
| Bandwidth config | localhost:7657/config | Adjust speed limits and share percentage |
| Network config | localhost:7657/confignet | Firewall, port, and reachability settings |
| Tunnel manager | localhost:7657/i2ptunnel/ | Manage all I2P tunnels and hidden services |
| I2PSnark | localhost:7657/i2psnark/ | Built-in BitTorrent client |
| SusiMail | localhost:7657/susimail/ | Built-in email client |
| Address book | localhost:7657/dns | Manage .i2p hostname mappings |
Five things you can do once connected
Browse .i2p websites
The most immediate use of I2P is browsing hidden websites. With your browser proxied through port 4444, navigate to any .i2p address. Several well-known sites serve as good starting points: i2p-projekt.i2p is the official I2P project site mirrored inside the network, i2pforum.i2p hosts the community support forum, stats.i2p provides network statistics and an address registration service, and notbob.i2p tracks uptime for known eepsites so you can see what’s actually online. When you encounter an unknown .i2p address, the proxy will offer “jump service” links that resolve the hostname - click these to add new sites to your local address book.
I2P also includes a default outproxy (exit.stormycloud.i2p) that lets you reach the regular internet through I2P, but this is not the network’s primary purpose and performance will be slow. I2P is designed as an internal darknet, not an exit-node network like Tor.
Torrent files anonymously with I2PSnark
I2PSnark is a fully functional BitTorrent client built into every I2P installation, accessible at http://127.0.0.1:7657/i2psnark/. It operates entirely within the I2P network - it cannot connect to clearnet torrents, and clearnet users cannot see I2P torrents. The web interface supports magnet links, DHT, drag-and-drop, torrent search, sequential downloads, and UDP trackers (added in version 2.10.0). Default tunnel length is three hops. Simply add .torrent files or magnet links through the interface.
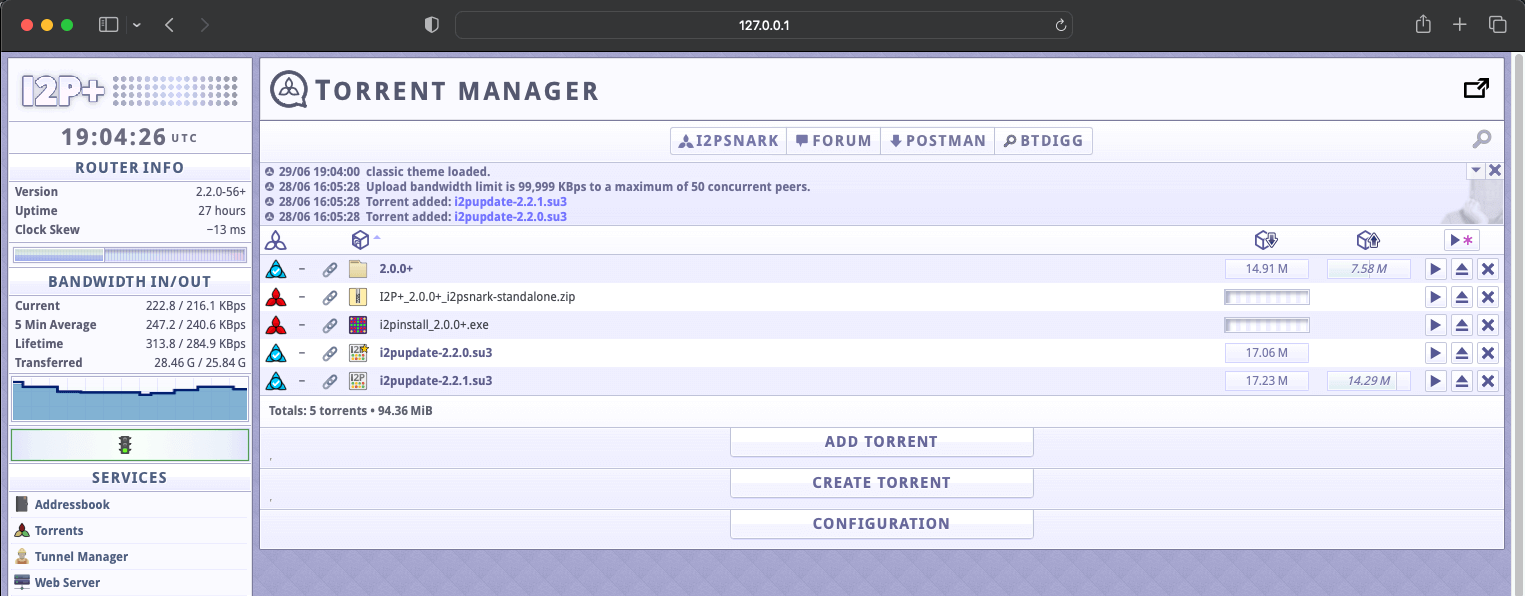
To find torrents, visit the Postman Tracker at http://tracker2.postman.i2p/ - a centralized hub where users search for and download torrents that have been uploaded by others within the I2P network. You can also upload your own torrents to share with the community.
![]()
Other I2P-compatible torrent clients include BiglyBT and qBittorrent with an I2P plugin.
Send encrypted email with SusiMail
SusiMail at http://127.0.0.1:7657/susimail/ is a web-based email client designed to avoid leaking identifying information. It connects to the mail.i2p mail server operated by “postman.” To get started, register an account at hq.postman.i2p (reachable through your I2P proxy), then log in with those credentials in SusiMail. Pre-configured I2PTunnel entries route SMTP through localhost:7659 and POP3 through localhost:7660. You can send email both to other @mail.i2p users and to regular internet email addresses (bridged through the mail server’s outproxy). SusiMail supports markdown formatting, drag-and-drop attachments, and HTML email.


Chat on IRC via the Irc2P network
I2P ships with a pre-configured IRC tunnel on localhost:6668. Point any IRC client at this address (with SSL/TLS disabled - I2P handles encryption) and you’ll connect to the Irc2P network, a federation of servers including irc.postman.i2p, irc.echelon.i2p, and irc.dg.i2p. Key channels are #i2p for general discussion, #i2p-dev for development, and #i2p-help for support. The IRC tunnel automatically strips identifying information from your connection. Recommended clients include WeeChat, Pidgin, and Thunderbird Chat.
Host your own anonymous website
Every I2P installation includes a Jetty web server already running on localhost:7658 with a corresponding I2P server tunnel. To publish a site, simply place HTML files in the document root: ~/.i2p/eepsite/docroot on Linux or %LOCALAPPDATA%\I2P\I2P Site\docroot on Windows. Your site automatically gets a cryptographic Base64 destination and a shorter xxxxx.b32.i2p address. To get a human-readable name like mysite.i2p, register it at address book services such as stats.i2p or no.i2p. For more advanced setups, you can replace Jetty with Apache or Nginx behind the I2PTunnel server tunnel - just remember to strip identifying server headers. For a detailed walkthrough, see our Creating an I2P Eepsite
guide.
Essential security practices for new users
Never browse I2P and the clearnet in the same browser profile. This is the single most important security rule. Create a dedicated Firefox profile via about:profiles or use the Easy Install Bundle’s pre-configured profile. Cross-contamination of cookies, history, and cached data between your anonymous and identified browsing is the most common operational security failure.
The official “I2P in Private Browsing” Firefox extension (available from Mozilla’s addon store) automates much of this by creating isolated container tabs with anti-fingerprinting, first-party isolation, and letterboxing enabled. For Chromium users, launch with separate flags: --user-data-dir=$HOME/.config/chromium-i2p --proxy-server="http://127.0.0.1:4444".